==> Check out the details and buy the plugin here, then, use the steps outlined in my tutorial below to setup your own registration-only content library, your membership site, or your internal company intranet.
If you get stuck, just drop a comment below or shoot me an email and I’ll help you get set up and running!

(Disclosure: Mel Wilson & Associates is a client)
A internal company website, often referred to as an intranet website, is generally used by large companies or organizations to share information internally. It’s like a membership site and can be used for:
- Communication: You can login to your companies internal website and access a calendar of upcoming events or company announcements/memos.
- Cost-Effectiveness: Rather than printing and maintaining physical documents, users can login and access documents online and print only what they need.
- On-Going Training: You can easily record and upload recaps from weekly/monthly company meetings and/or any training videos to the site.
Before you go out and create an internal website you want to determine the purpose and goals of the site. In the case of Mel Wilson & Associates, the purpose and goals was to:
- Give agents an easier way to access and download all of the documents they need to manage an escrow from one location
- Increase communication amongst the team without inundating them with constant email reminders
- Provide a central location for them to get updated on company news and access company training materials
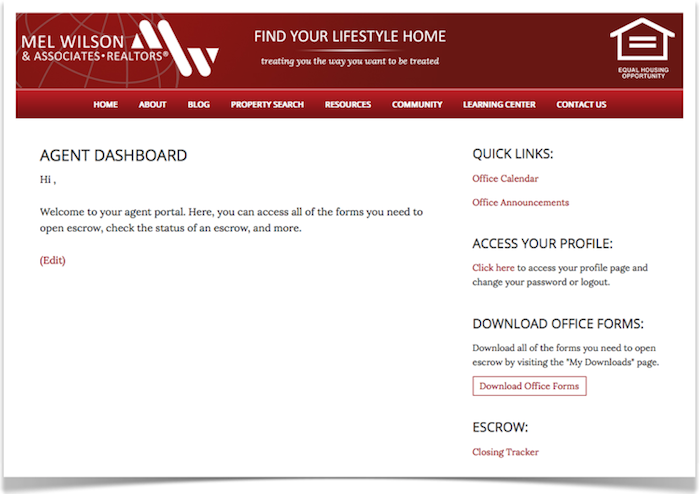
Using the Premise membership plugin for WordPress, I created an internal website for all of the 40+ agents of Mel Wilson & Associates to access their documents, upcoming events, and more. The resulting Agent Portal looks like this:
The calendar page for the office looks like this:
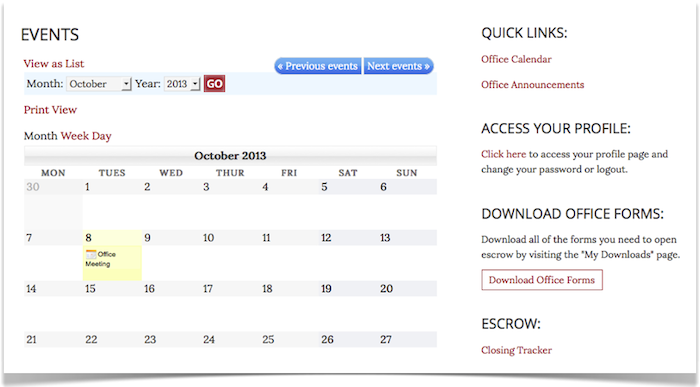
… No more emailing back and forth with individual members of the team to see what’s happening this week or next. Now they can access an updated calendar by logging into their agent portal.
The site is powered by:
- The Premise membership plugin for WordPress
- The Focus Child Theme by StudioPress
- The My Calendar WordPress plugin for the office calendar page
- Genesis Simple Sidebars to create the custom sidebar for the links in the Agent Portal
In this post, I’m going to show you how to build your own company membership portal using Premise. So roll up those sleeves, grab a cup of coffee, and let’s get to work!
Remember, you can use this process to create your own internal company website or simply create a free content library for your readers to subscribe to. I used these same steps to build the new content library here on the blog. You just have to start by asking yourself: what am I trying to accomplish?
Ready? Let’s get started …
Step #1: Create an access level for your product
To do this perform the following steps:
- Log in to your WordPress dashboard
- Scroll down to “Member Access” > Click on “Access Levels”
From the “Access Levels” page, you’re simply going to add a new tag. In my case, I called it “Agent Portal” as you can see below: 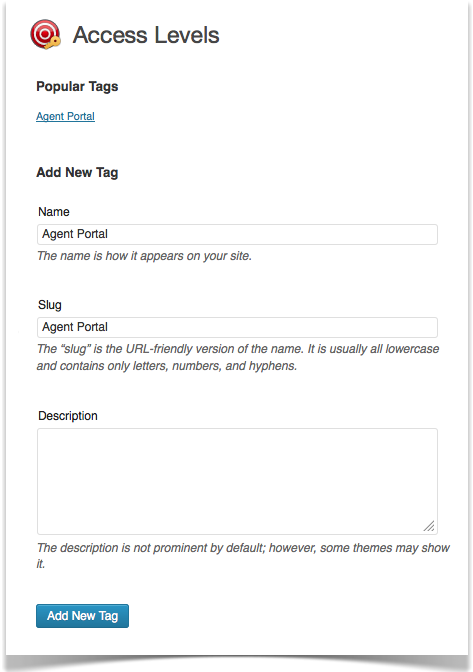
Click “Add New Tag” and you’re all set.
Step #2: Create your product in Premise
To do this perform the following steps:
- Log in to your WordPress dashboard
- Scroll down to “Member Access” > Click on “Products”
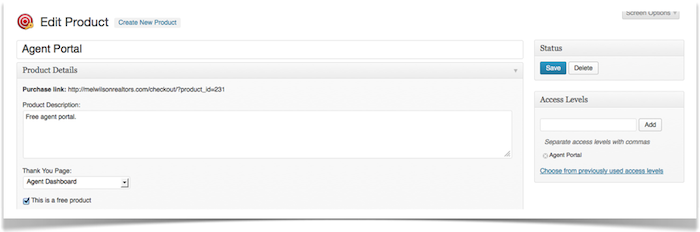
From the “Products” page, you’re going to click on “Create New Product” at the top of the page. Then, just proceed to fill in your product details: product description, select a “thank you” page (we’ll complete this in a later step), and add your access level.
Here’s what my new product settings page looks like:
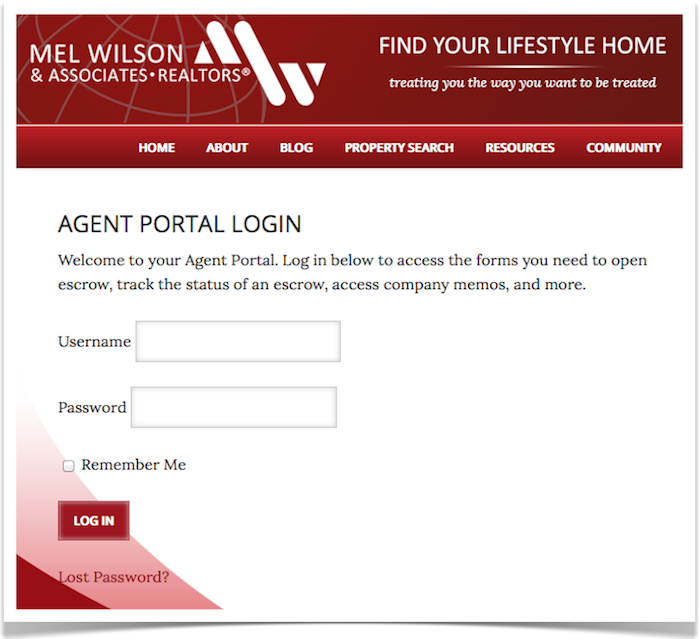
Step #3: Create your login page
To do this I simply created a new page in WordPress and titled it: Agent Portal Login.
[password_recovery_link]
Here’s what the resulting page looks like:
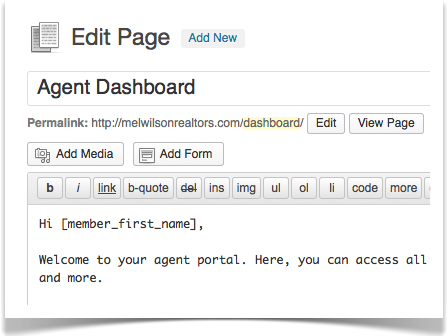
Step #4: Create your dashboard page
To do this I simply created a new page in WordPress and titled it: Agent Dashboard.
I used a Premise shortcode to personalize the page and welcome users by name:
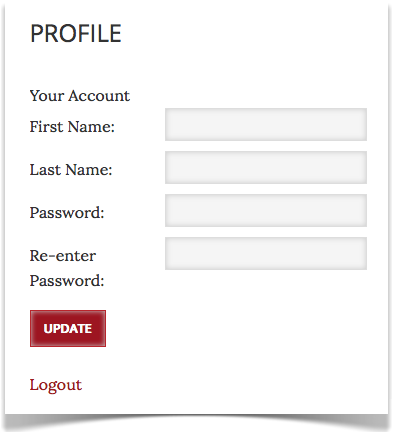
Step #5: Create a member profile page
To do this I simply create a new page in WordPress and titled it: Profile.
I used the following shortcode on the page:
[logout-link text=’Logout’]
Here’s what the resulting profile page looks like:
Step #6: Create a checkout page
(Note: In this case, the checkout page is only being used temporarily to have the agents register their account. Still, we need a checkout page to register users.)
To do this I simply created a new page in WordPress and titled it: Checkout.
I used a Premise shortcode to display the checkout form:
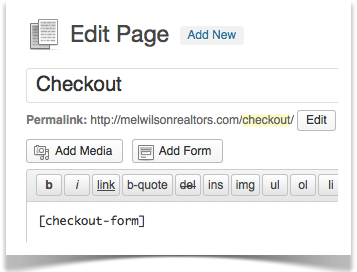
Then, we’ll use the “purchase link” generated when we created our product in step #2 to direct users to checkout.
Step #7: Configure your member access settings
To do this simply perform the following steps:
- Log in to your WordPress dashboard
- Scroll down to “Member Access” > Click on “Settings”
From the settings page you want to configure your settings for your checkout, login, and member page. My settings look like this:
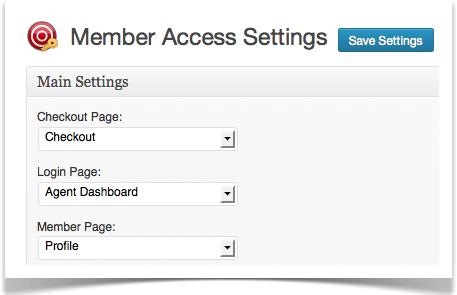
When a user clicks on my “purchase link” they’re directed to the checkout form that I created in step #6. When they login, they’re redirected to the member dashboard page created in step #4. And if they want to edit their password, they can do so by accessing their profile page generated in step #5.
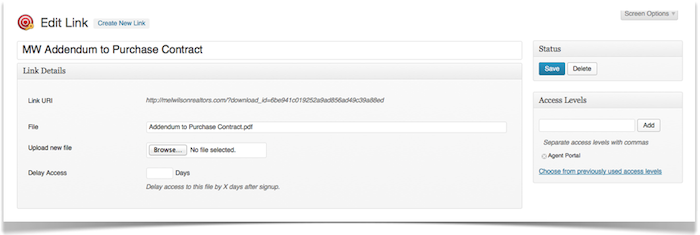
Step #8: Add your links to the link manager
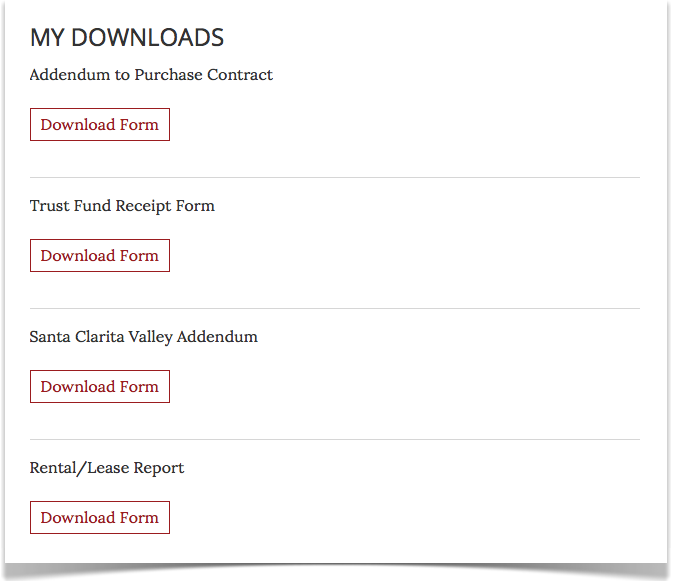
In this case we wanted to create a page where agents could access and download all of the various paperwork needed to manage a transaction. So we created a page called “My Downloads” to manage this and we added the various forms as PDF’s to the Premise “Link Manager” so that un-registered users can’t access the content.
To do this simply perform the following steps:
- Login to your WordPress dashboard
- Scroll down to “Member Access” > Click on “Link Manager”
From the “Link Manager” page click on “Create New Link.” There, simply upload your files for download and add your access level. Here’s an addendum to the purchase contract that we uploaded as a PDF:
The link URL that is generated is the URL that I’m going to use for users to download their files once they’ve logged into the member dashboard:
Step #9: Let’s edit the login page to display a different message to users that are signed in
Remember the login page that we created in step #3? Signed in users can still access that page. So rather than displaying the same message, I want to display a different message to already logged in users like this:
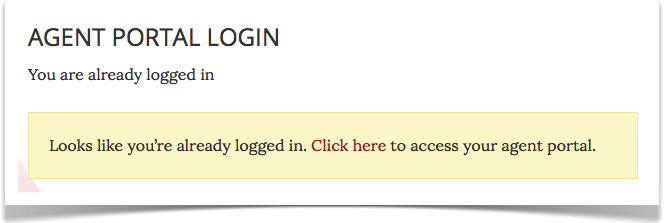
To accomplish this, I used the following shortcodes to display different messages to users when they’re logged in and not logged in:
Insert content here.
[/hide_from]
[show_to accesslevel=”Agent Portal”]
Insert content here.
[/show_to]
Test Your Settings!
Once you’ve completed each of these steps, all you have to do is test your settings and you’re all set to go!
Were users able to register their account?
Were they redirected to the proper dashboard page?
Can they access their downloads ok? Are they able to successfully download documents?
Can they access their profile page and change their password/logout ok?
It’s quite a few steps to configure but with a little work, you can have your own internal company website up and running in no time!